简单Web UI 自动化测试框架 pyse
WebUI automation testing framework based on Selenium and unittest.
基于 selenium 和 unittest 的 Web UI自动化测试框架。
特点默认使用CSS定位,同时支持多种定位方法(id\name\class\link_text\xpath\css)。
基于Selenium二次封装,使用更简单。
提供脚手架,快速生成自动化测试项目。
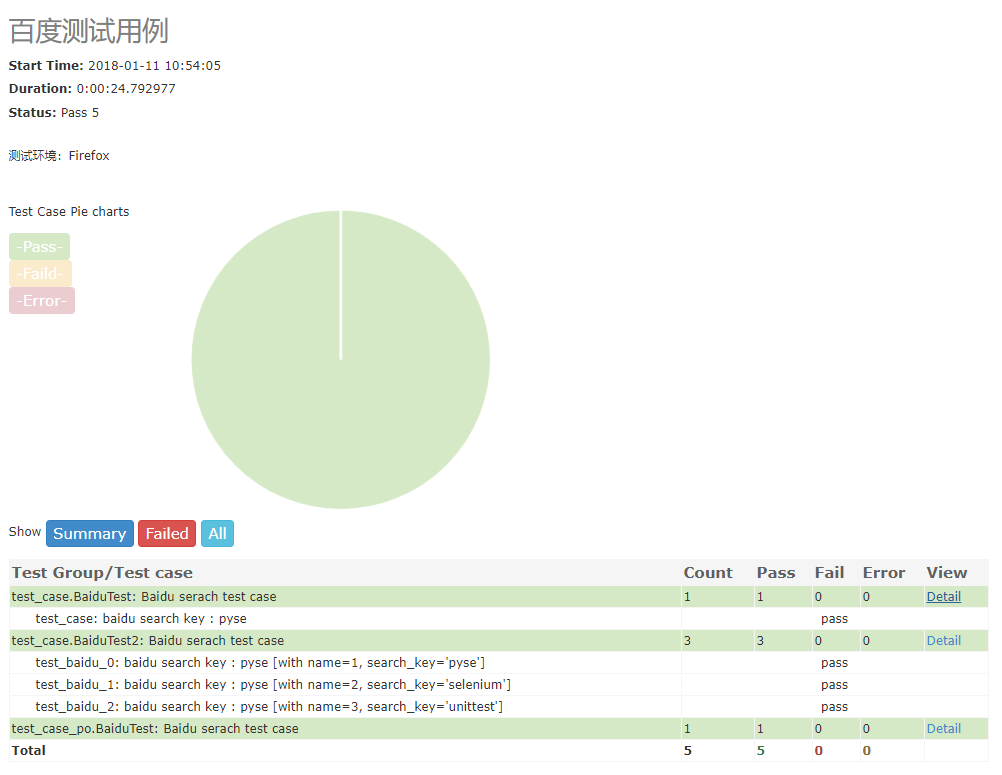
自动生成/reports/目录,以及HTML测试报告生成。
自带断言方法,断言title、URL 和 text。
支持用例参数化。
安装 > pip install -U git+https://github.com/defnngj/[email protected] pyse命令1、查看帮助:
> pyse -h usage: pyse [-h] [-V] [--startproject STARTPROJECT] [-r R] WebUI automation testing framework based on Selenium. optional arguments: -h, --help show this help message and exit -V, --version show version --startproject STARTPROJECT Specify new project name. -r R run test case2、创建项目:
>pyse --startproject mypro 2019-11-07 00:24:57,783 - INFO - Start to create new test project: mypro 2019-11-07 00:24:57,784 - INFO - CWD: D: 2019-11-07 00:24:57,785 - INFO - created folder: mypro 2019-11-07 00:24:57,786 - INFO - created folder: mypro\test_dir 2019-11-07 00:24:57,787 - INFO - created folder: mypro\reports 2019-11-07 00:24:57,788 - INFO - created file: mypro\test_dir\test_sample.py 2019-11-07 00:24:57,789 - INFO - created file: mypro\run.py3、运行项目:
> cd mypro> pyse -r run.py Python 3.7.1 ______ __ __ _______ _______ | _ || | | || _____|| ____| | |_| || |_| || |_____ | |____ | ___||_ _||_____ || ____| | | | | _____| || |____ |__| |___| |_______||_______| generated html file: file:///D:\mypro\reports\2019_11_12_22_28_53_result.html .14、查看报告
你可以到 mypro\reports\ 目录查看测试报告。
请查看 test_sample.py 文件
import pyse class BaiduTest(pyse.TestCase): def test_baidu(self): ''' baidu search key : pyse ''' self.open("https://www.baidu.com/") self.type("#kw", "pyse") self.click("#su") self.assertTitle("pyse_百度搜索") if __name__ == '__main__': pyse.main("test_sample.py", debug=True)说明:
创建测试类必须继承 pyse.TestCase。
测试用例文件命名必须以 test 开头。
元素定位方式默认使用 CSS 语法 #kw, 也可以显示的使用 css=>#kw。
pyse的封装了assertTitle、assertUrl 和 assertText等断言方法。
通过main()方法运行测试用例。
APIpyse 提供的API
self.accept_alert() self.clear("css=>#el") self.click("css=>#el") self.click_text("新闻") self.dismiss_alert() self.double_click("css=>#el") self.drag_and_drop("css=>#el","css=>#ta") self.get_alert_text() self.get_attribute("css=>#el","type") self.get_display("css=>#el") self.get_text("css=>#el") self.get_title() self.get_url() self.js("window.scrollTo(200,1000);") self.max_window() self.move_to_element("css=>#el") self.open("https://www.baidu.com") self.open_new_window("link_text=>注册") self.close() self.quit() self.refresh() self.right_click("css=>#el") self.screenshots('/Screenshots/foo.png') self.select("#nr", '20') self.select("xpath=>//[@name='NR']", '20') self.set_window(wide, high) self.submit("css=>#el") self.switch_to_frame("css=>#el") self.switch_to_frame_out() self.type("css=>#el","selenium") self.wait(10) main() 方法 pyse.main(path="./", browser="chrome", title="百度测试用例", description="测试环境:Firefox", debug=True )说明:
path : 指定测试目录。
browser: 指定测试浏览器,默认Chrome。
title : 指定测试项目标题。
description : 指定测试描述。
debug : debug模式,设置为True不生成测试HTML测试。
Run the test pyse.main(path="./") # 当前目录下的所有测试文件 pyse.main(path="./test_dir/") # 指定目录下的所有测试文件 pyse.main(path="./test_dir/test_sample.py") # 指定目录下的测试文件 pyse.main(path="test_sample.py") # 指定当前目录下的测试文件说明:
如果指定的目录,测试文件必须以test 开头。
如果要运行子目录下的文件,必须在子目录下加 __init__.py 文件。
支持的浏览器及驱动如果你想指定测试用例在不同的浏览器中运行,非常简单,只需要在pyse.main()方法中通过browser设置。
if __name__ == '__main__': pyse.main(browser="firefox")支持的浏览器包括:"chrome"、"firefox"、"ie"、"opera"、"edge"、"chrome_headless" 等。
不同浏览器驱动下载地址:
geckodriver(Firefox):https://github.com/mozilla/geckodriver/releases
Chromedriver(Chrome):https://sites.google.com/a/chromium.org/chromedriver/home
IEDriverServer(IE):
operadriver(Opera):https://github.com/operasoftware/operachromiumdriver/releases
MicrosoftWebDriver(Edge):https://developer.microsoft.com/en-us/microsoft-edge/tools/webdriver
==========================================================
元素定位温馨提示: 本文由杰米博客推荐,转载请保留链接: https://www.jmwww.net/file/web/10302.html


,你需要这么做")
,你需要这么做")


