Using ASP.Net WebAPI with Web Forms
Asp.Net WebAPI is a framework for building RESTful HTTP services which can be used across a wide range of clients including web, phone and desktop applications. With WebAPI we can use XML and JSON to send and retrieve data from the service. The use of Json or XML makes it quite flexible to be used across a variety of devices.
Although WebAPI ships and installs with ASP.Net MVC 4, it can be used in normal Web Forms application as well.
In this example, we will use WebAPI with a traditional Web Forms application for adding and displaying a list of User Information. We will be using Visual Studio 2012 and .Net 4.5.
Creating the Project
Open Visual Studio 2012, Go To New -> Project. Select Visual C# -> Web from the left hand navigation and select project type as ASP.Net Web Forms Application. Enter the project name as WebAPIDemo

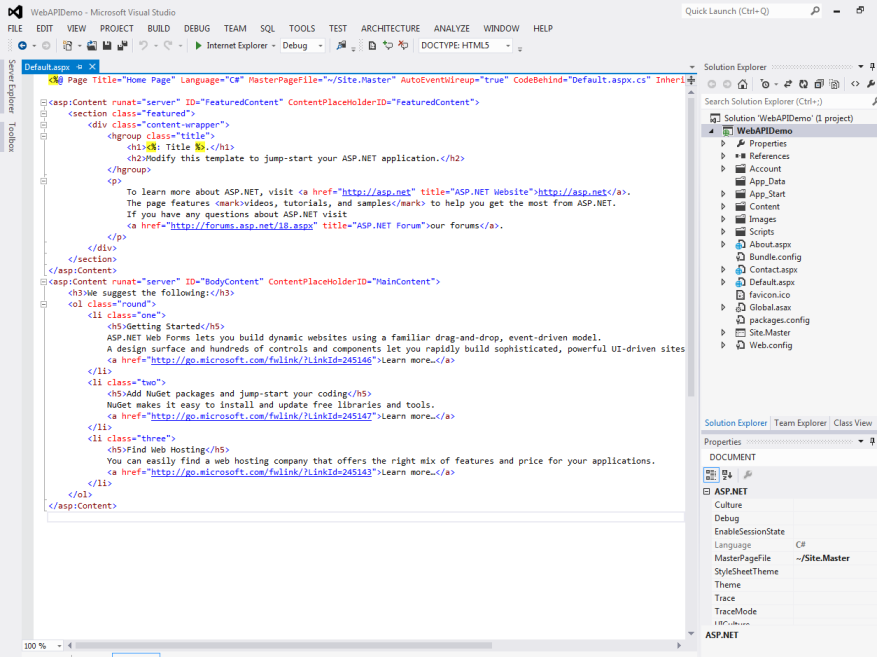
A new project will be created with a default template and our solution will show the following structure

Adding Model Class
We will then add a Model Class to our project. The Model class will represent the data in our application. We will add a model class called Users in our project
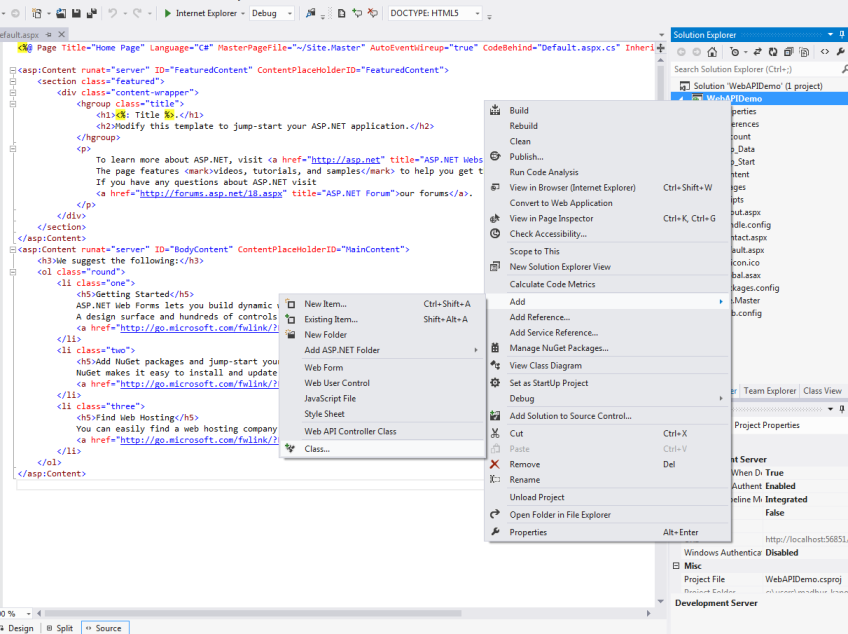
Right Click the Project in the Solution Explorer, Select Add -> Class from the Context Menu. The name of the class will be “Users” and it will have the following properties

Hide Copy Code
namespace WebAPIDemo { public class Users { public int Id { get; set; } public string FirstName { get; set; } public string LastName { get; set; } public string Company { get; set; } public string Email { get; set; } public string PhoneNo { get; set; } } }The WebAPI can automatically serialize the model as JSON or XML object and will write the data in the body of the HTTP response. If the clients can read the serialize data, they will be able to deserialize it. Most of the clients are able to read the XML or JSON data. The clients can also specify the format it wants by setting the “Accept Header” property in the request message.
Creating The Repository
Ideally in a production scenario, we should be storing our data in some sort of persistent storage like database but to keep this demo simple, we will storing it in local memory.
To keep our storage implementation separate from the application code, we will be using Repository pattern. This way we can change our storage implementation at any future data without many changes to the application code.
We will start by creating a generic repository interface. Add a new class to the project and call it“IUserRepository”. It will have the following code
Hide Copy Code
namespace WebAPIDemo { public interface IUserRepository { IEnumerable<Users> GetAllUsers(); string AddUser(Users user); Users GetUserById(int id); void DeleteUser(int id); } }The “GetAllUsers” function return a list of the all the users. The “AddUser” function will add a new user and“GetUserById” will return a particular user based on the id that has been passed.
Add a Class to the solution called “UserRepository”. The class will implement the “IUserRepository” and will have the following implementation.
Hide Shrink Copy Code
namespace WebAPIDemo { public class UserRepository : IUserRepository { private List<Users> userList = new List<Users>(); private int _id = 3; public UserRepository() { userList.Add(new Users { Id = 1, FirstName = "Madhur", LastName = "Kapoor", Company = "ABC", Email = "madhur@abc.com", PhoneNo = "65431546" }); userList.Add(new Users { Id = 2, FirstName = "Alan", LastName = "Wake", Company = "XYZ Corp", Email = "alan@xyz.com", PhoneNo = "64649879" }); } public IEnumerable<Users> GetAllUsers() { return userList; } public string AddUser(Users user) { user.Id = _id++; userList.Add(user); return "User added"; } public Users GetUserById(int id) { var user = userList.FirstOrDefault<Users>((p) => p.Id == id); if (user == null) { throw new HttpResponseException(HttpStatusCode.NotFound); } return user; } public void DeleteUser(int id) { var user = userList.FirstOrDefault<users>((p) => p.Id == id); if (user == null) { throw new HttpResponseException(HttpStatusCode.NotFound); } userList.Remove(user); } }</users>In the class, we are using a local variable “userList” to store all the users. In the constructor, we are adding a few records to the list.
The “AddUser” function adds a new user to the list with a new Id.
温馨提示: 本文由Jm博客推荐,转载请保留链接: https://www.jmwww.net/file/69708.html


